Here’s How to Plant a Tree Step by Step
If you’re wondering how to help the environment close to home, planting a tree is a great place to start! Even if you plant just one, it will benefit the environment for years to come. That’s because trees help clean the air, filter water, offset carbon, create shade, give birds a place to build a nest, enrich the soil, and provide food and shelter for small creatures. And that’s just the shortlist of the many benefits of trees.
Planting a tree is one of the best ways to help the environment. Here’s how to do it right.
Follow along as our Chief Tree Officer, Bill Toomey, plants a Black Walnut Tree and shares tips gleaned from his 20+ years of Conservation and Urban Forestry experience!
There are a few things to think about before you start planting. When, where, and how you plant your tree will affect its survival. Below are some important considerations before you get your hands in the dirt.
When is the best time to plant a tree?
The best times to plant a tree are usually in spring or fall when weather conditions are moist and cool. Pick a location where your tree will thrive and that you’re close to so that you can watch it grow for many years to come.
How to choose which tree species to plant
You can visit your local tree nursery or garden center to find the best species of the tree to plant. Nursery staff are usually very knowledgeable about this and can help answer any questions. But some basic considerations you should think about include: your property or planting site’s microclimate, amount of sunlight, soil type and chemistry, drainage, and hardiness zone.
How to choose where to plant
You’ve chosen a native tree species and now you just need to choose a planting site! Careful planning at this stage will help ensure that your young sapling can grow into a healthy, mature tree that reaches its full potential and benefits the surrounding environment. There are a few key things to consider here. These include:
- How much space does your tree need to grow? How large will the canopy grow (crown spread), and how deep and far will the roots spread? Keep in mind that a tree’s roots can spread much wider than its canopy aboveground.
- Considering the standard growth structure of your chosen species will help inform what the appropriate distance is that you should plan to plant away from structures, foundations, driveways or sidewalks, underground plumbing, power lines, and any other built or natural features of the property. A good rule of thumb here is that trees usually need more space than you’d think!
- As above, so below. Be sure to call your utility company so that they can mark any underground lines that may be running through your property. This will help you avoid any headaches (or, potentially, serious injury) associated with damaging utility lines.
- Another often overlooked but important consideration is: what happens in your yard during different seasons throughout the year? And are you okay with the tree dropping leaves, needles, seeds, cones, fruit, nuts, or sap?
- And finally: what are your plans for the future? Whenever you plant a tree, the hope is that it will be able to live out its lifespan. To help ensure that, it’s worth thinking about whether you’ll want to build a garage, shed, play area or other structure in the future — and plan around that.
here’s how to plant a tree step-by-step

1. DIG A HOLE 3 INCHES DEEPER THAN THE LENGTH OF THE ROOTS
Tip: Choose a place with good wind protection.
If your site is exposed to the wind, use nearby objects (like a rock or stick) to create a windbreak. Then, plant on the north side of the windbreak for shade and wind protection. And remember: the cooler and shadier, the better, so if you’re on a hillside, make sure that you’re planting on the north slope. That way, the sapling won’t get too much sun.

2. CAREFULLY REMOVE THE SEEDLING FROM ITS CONTAINER
Tip: Gently loosen the soil to help the roots spread out.
Make sure your seedling isn’t root bound. If it is, you may have to cut an X through the bottom of the root ball to break it up, but if it isn’t too bad, simply use your hand to gently break up the pattern. Exercise caution, because if you’re too rough with the roots, you’ll increase the risk of the tree going into transplant shock.

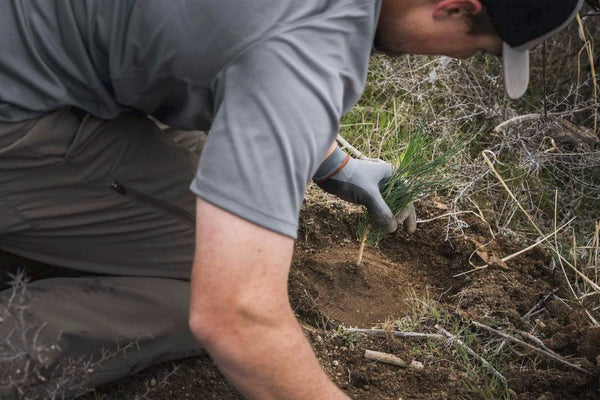
3. gently nestle it into the hole and backfill, compressing as you go
Tip: Make sure it’s centered and upright.
Think of this step as placing the seedling in a “bowl” that will be filled with water. Taking a little extra care during this step will help ensure that the roots get enough water to do their job. Once it’s placed, backfill with the removed soil and compress in layers until the roots are entirely covered, but the trunk flare remains partially aboveground.

4. BUILD A RAISED BERM TO HELP DIRECT WATER FLOW
Tip: Create a funnel that will allow water to drain towards the tree.
Now is also the time to do the tug test: lightly tug the tree to check that the soil is sufficiently compacted — if you can pull it right out, it’s not secure enough! And if you’re planting on a north-facing slope, consider fortifying the downhill side with whatever’s handy (like rocks and sticks) to keep the soil from washing away.

5. ADD MULCH TO HELP WITH WATER RETENTION AND WEEDS
Tip: Make a ring of mulch around the tree but avoid letting it touch the bark.
Be sure to leave a baseball-sized perimeter around the stem, because mulch retains moisture and can cause rot if it touches it. Done properly, mulch shields the soil from heavy precipitation and sun, which helps prevent water from evaporating off the soil surface before the tree gets a chance to drink.

6. WATER YOUR NEW TREE TO HELP IT ACCLIMATE TO ITS NEW HOME!
Tip: 1 gallon of water once a week should be sufficient for most seedlings.
Watering will help your new tree respond to the stress of being transplanted, and encourage its roots to grow and spread. If you want to get really fancy, you can set up a drip irrigation system that will slowly feed water to the roots over time. This will really give things a boost!